Learn
PlugPane.
Step-by-step guides for every feature — from your first scan to managing updates, licenses, and disk space.
Installation
Download, install, and get PlugPane running on your Mac in under a minute.
Go to plugpane.com and click "Name your own price on Gumroad" to grab the latest DMG.
Open the downloaded DMG file. You'll see the PlugPane app and an Applications folder shortcut.
Drag PlugPane.app into the Applications folder.
Launch PlugPane from Applications or Spotlight. Because it's Apple-signed and notarized, macOS won't show any security warnings — just open straight away.
PlugPane ships as a universal binary — the same DMG runs natively on Apple Silicon (M1/M2/M3/M4) and Intel Macs. No Rosetta required on either.
First Launch
What happens when you open PlugPane for the very first time.
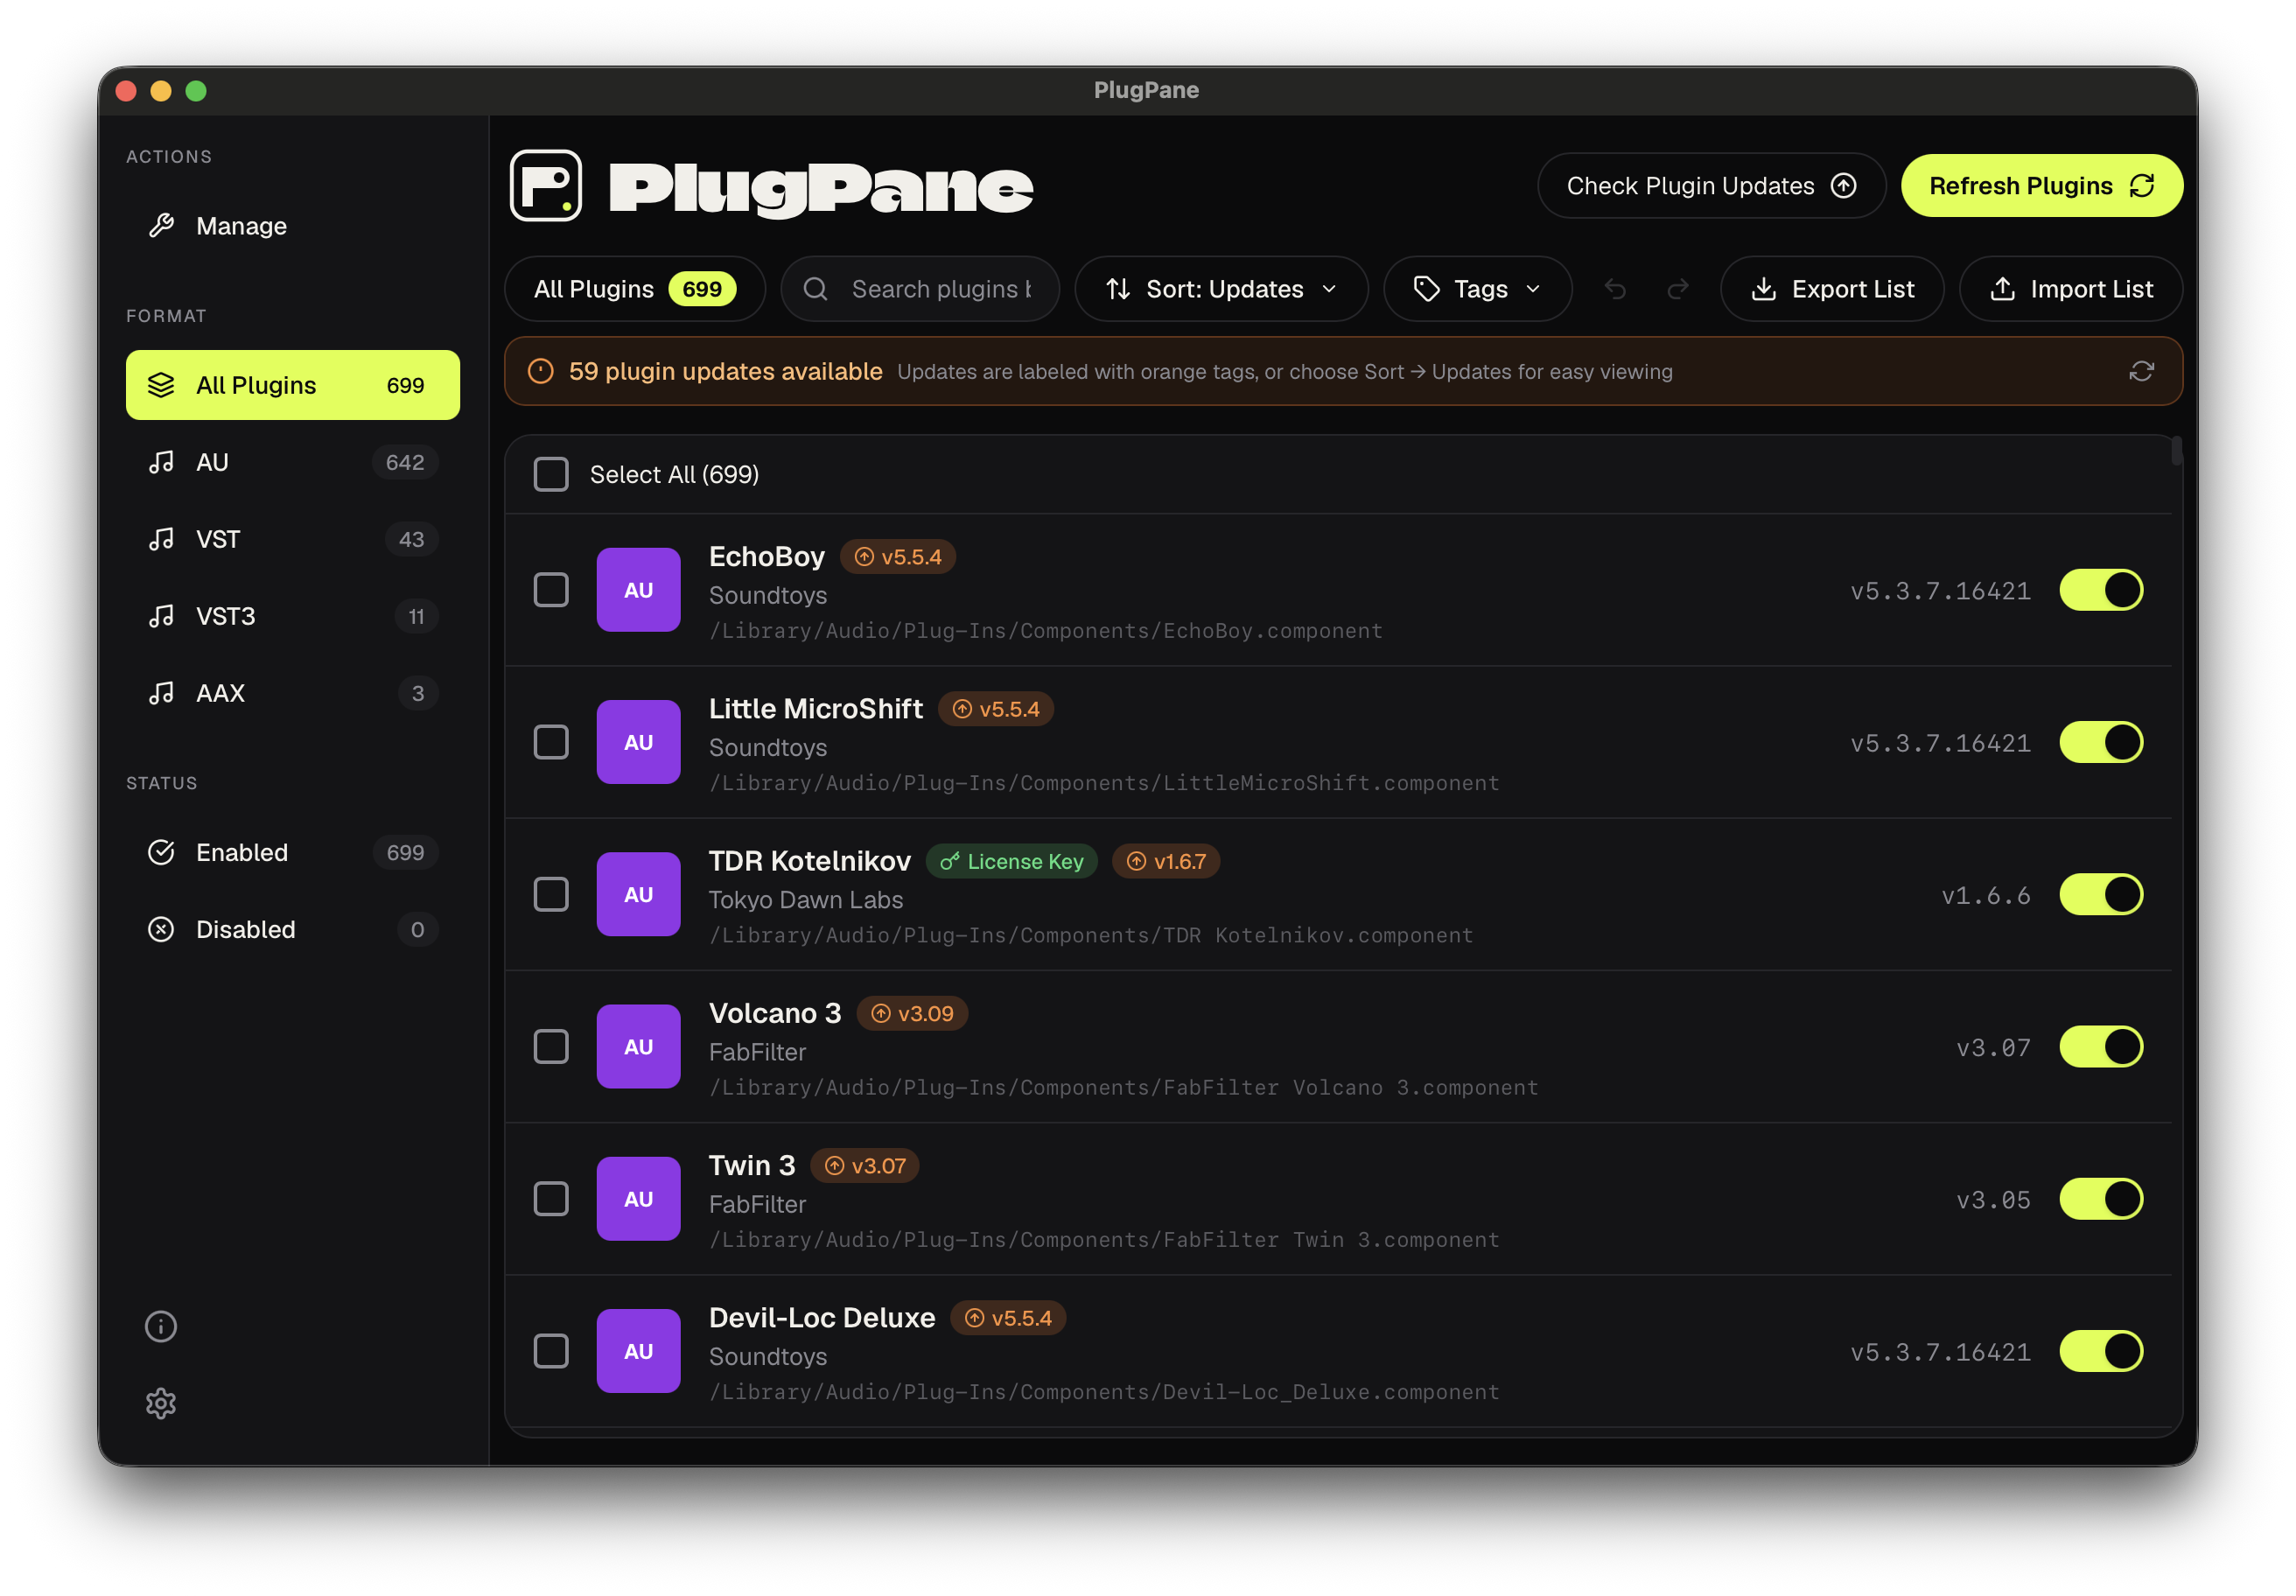
On first launch, PlugPane shows a loading screen while it scans your system. This caches plugin metadata and typically takes 1–3 minutes depending on your library size.
PlugPane scans all standard plugin paths automatically: /Library/Audio/Plug-Ins/ and your user library.
Once the scan completes, you'll land on the main plugin list with your entire library already indexed and ready to browse.
The initial scan only runs once. After that, PlugPane loads instantly from its local database. Use Refresh Plugins in the top-right to pick up newly installed plugins.
Browsing Your Library
Search, filter, and sort through hundreds of plugins instantly.
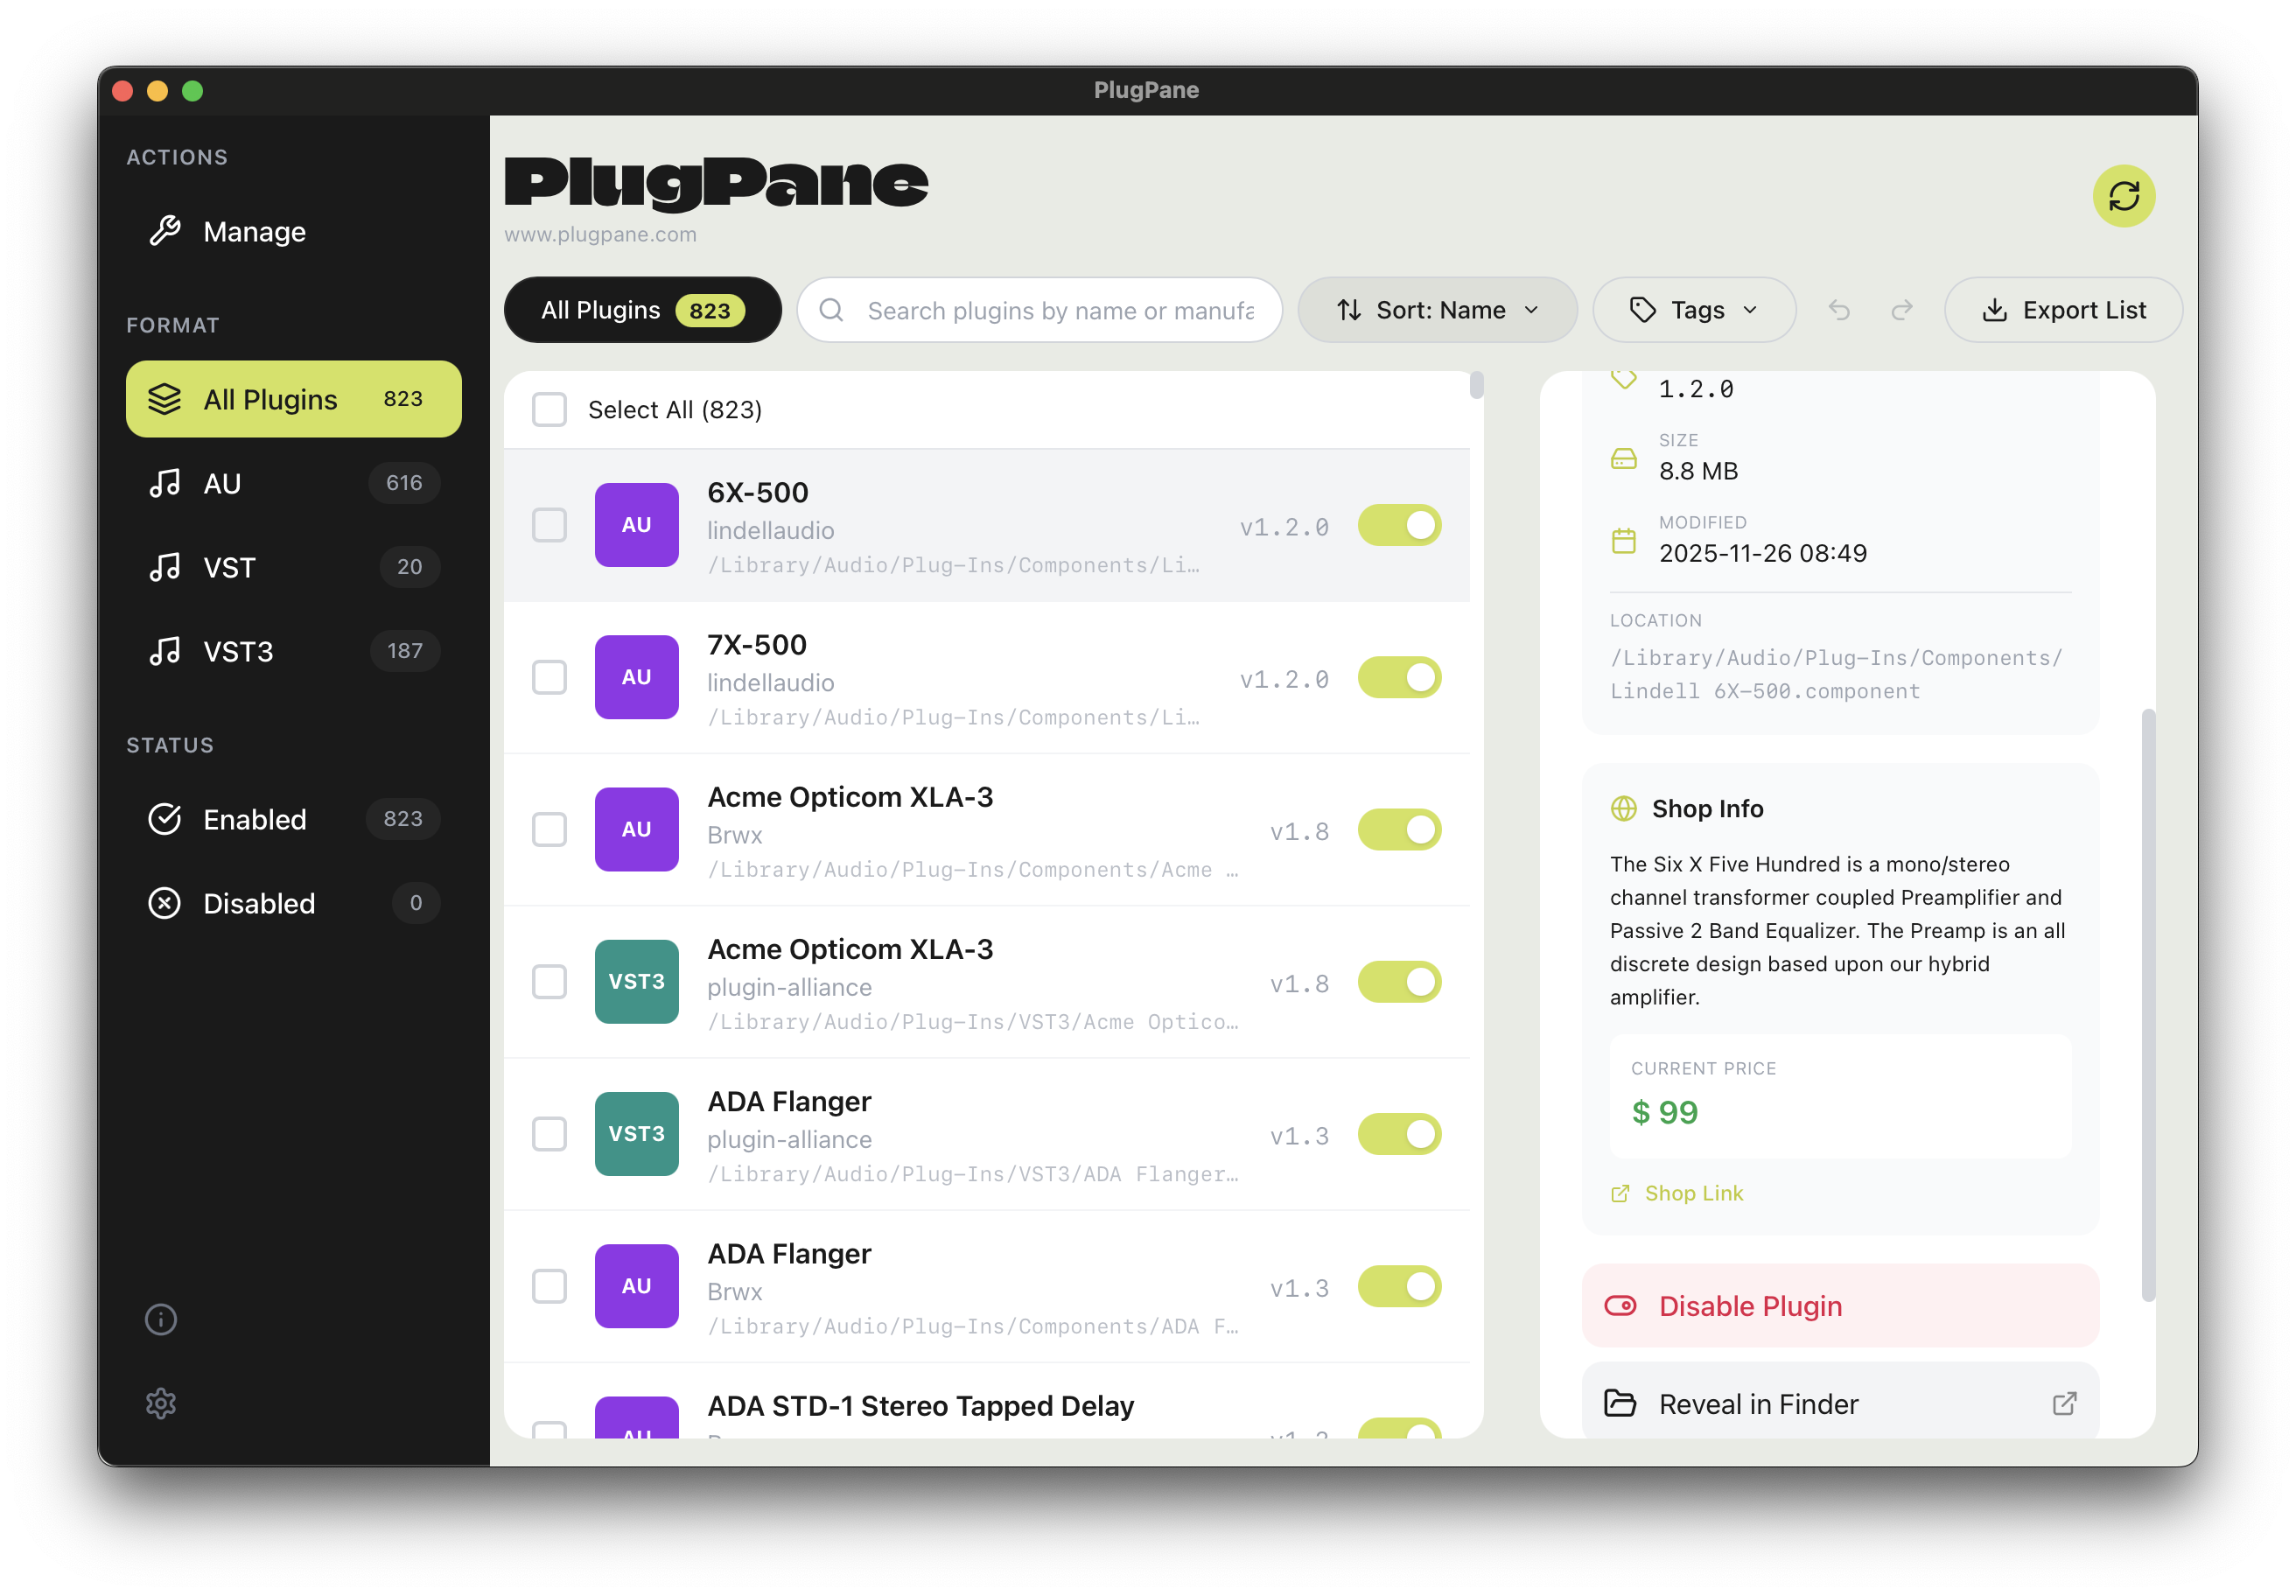
Filter by format using the pills in the sidebar (All, AU, VST, VST3, AAX) to narrow down by plugin type.
Search by typing in the search bar — it matches against plugin name and manufacturer in real time.
Sort using the Sort dropdown: by name, manufacturer, format, size, or updates. "Sort by Updates" puts every plugin with a pending update at the top.
Filter by Tag using the Tags dropdown to show only plugins with a specific tag applied.
The status sidebar also lets you filter by Enabled or Disabled to quickly see which plugins are currently active in your DAW.
Enable & Disable Plugins
Instantly toggle plugins in and out of your DAW without uninstalling anything.
Find the plugin you want to disable in the list. Click the toggle switch on the right side of the row.
Disabling a plugin renames it with a .disabled extension on disk. Your DAW won't load it on the next session start.
To re-enable, flip the toggle back — the extension is removed and the plugin loads normally next time you open your DAW.
Common uses
Troubleshoot DAW crashes
Disable plugins one by one to find the culprit
Speed up DAW startup
Disable plugins you rarely use to reduce scan time
Client sessions
Disable plugins a client doesn't have to avoid missing plugin warnings
CPU management
Disable CPU-heavy plugins you're not currently using
Plugin Detail View
Click any plugin to open a full detail panel with version info, architecture, and more.
Click any plugin in the list to open the detail panel on the right. It shows version, format, architecture, file size, and last modified date.
The Plugin Detail Page link (globe icon) opens the manufacturer's official product page directly in your browser — useful for release notes and documentation.
The Reveal in Finder button shows you exactly where the plugin bundle lives on disk.
Use the detail panel to add or edit license information, apply tags, and control the Track Updates toggle for that plugin.
The architecture badge (Apple Silicon / Universal / Intel) tells you at a glance whether a plugin is running natively on your chip or through Rosetta. Intel on an M-series Mac means it's running via Rosetta 2.
Tagging Your Plugins
Create color-coded tags and filter your entire library by how you actually work.
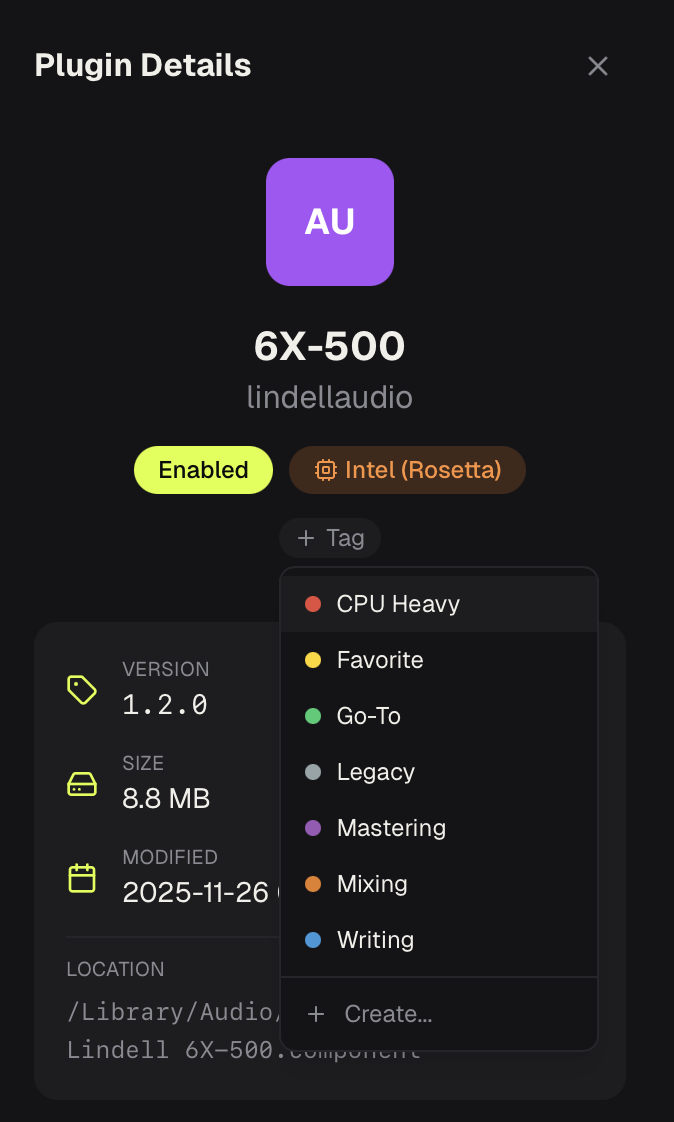
Click any plugin to open the detail panel. Click + Tag to open the tag picker.
Select an existing tag from the list, or click Create New Tag to define a name and pick a color.
Applied tags appear as colored chips on the plugin card in the main list.
Filter by tag using the Tags dropdown in the toolbar — select any tag to instantly isolate plugins that have it.
Tag ideas
Tags are included when you Export List to CSV — so you can back up your entire tagging system alongside your plugin inventory.
Plugin Update Tracker
See which of your plugins have updates available, and download them directly.
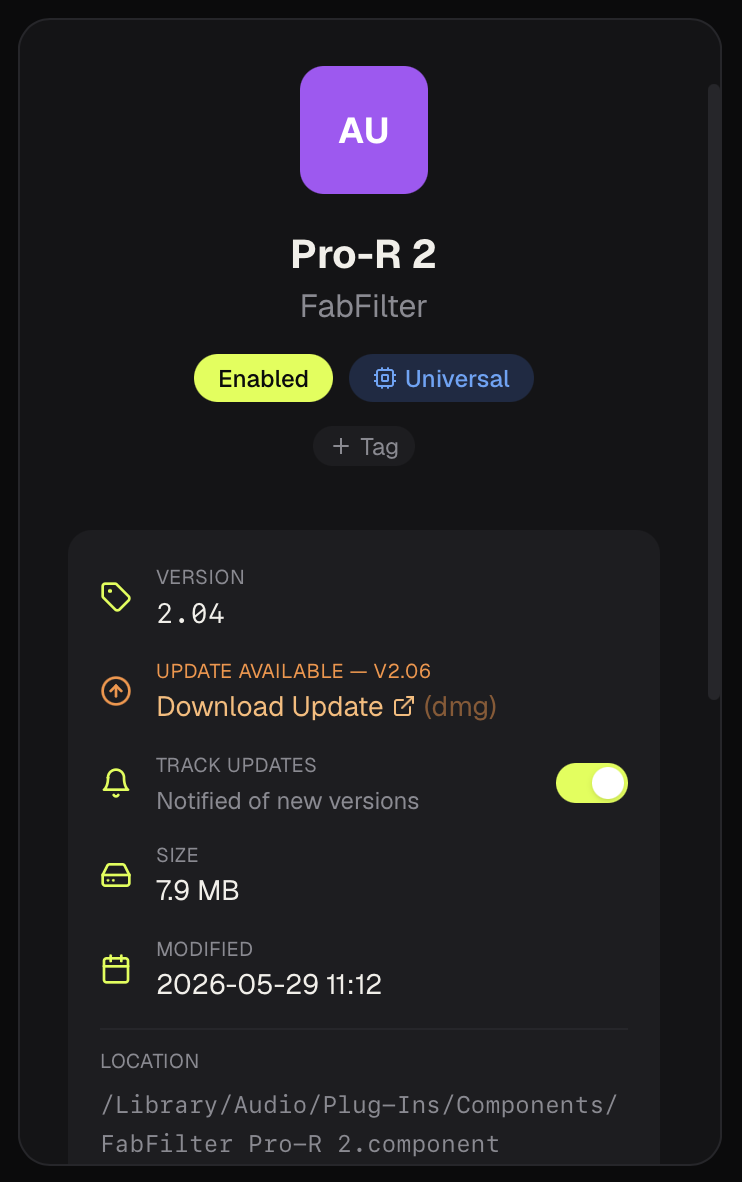
Click Check Plugin Updates in the top toolbar. PlugPane fetches the latest version data and compares it against your installed versions.
Plugins with updates available show an orange badge with the latest version number on their card in the list.
Use Sort → Updates to float all outdated plugins to the top of the list.
Click a plugin with an update to open the detail panel. Tap Download Update to go directly to the installer — the label shows whether it's a DMG, ZIP, PKG, or web download before you click.
To ignore updates for a specific plugin (e.g. you're staying on an older version intentionally), open its detail panel and toggle Track Updates off. It disappears from the count and sort immediately.
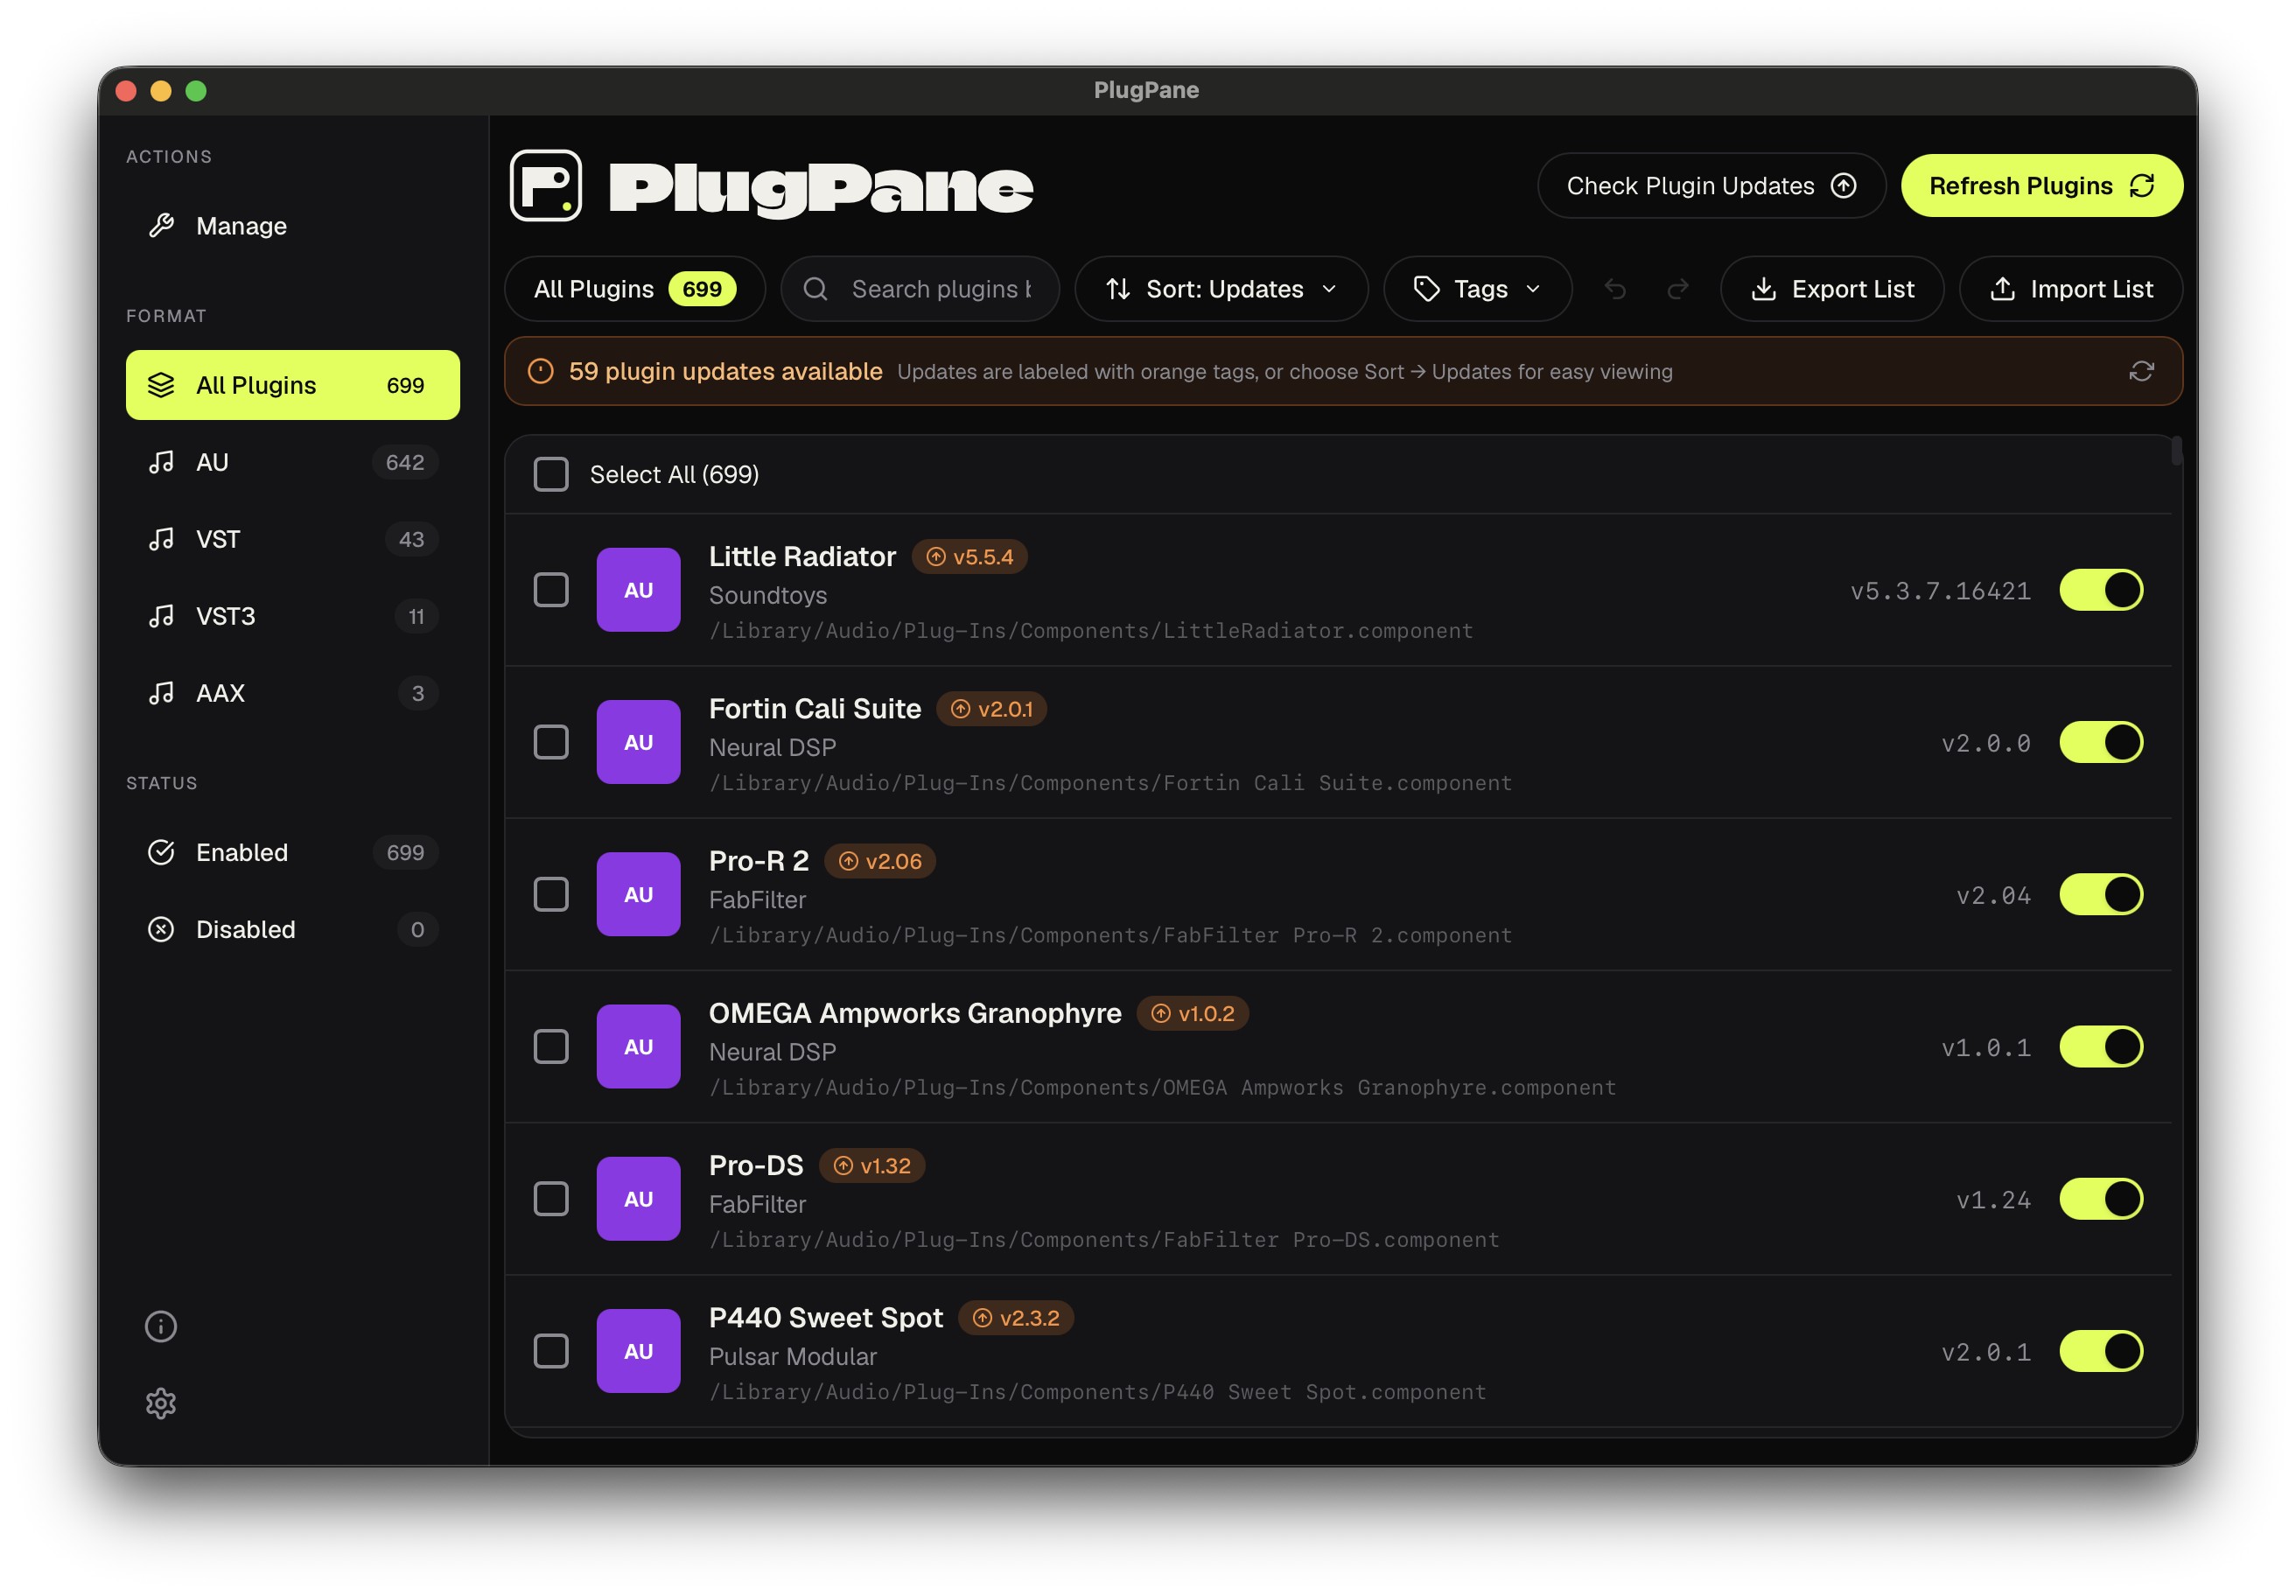
After installing an update for a plugin, just click Check Plugin Updates again — no full rescan needed. PlugPane reads the new version off disk automatically and clears the badge.
Plugin License Vault
Store every serial number in one place. Masked by default, exportable as a backup.
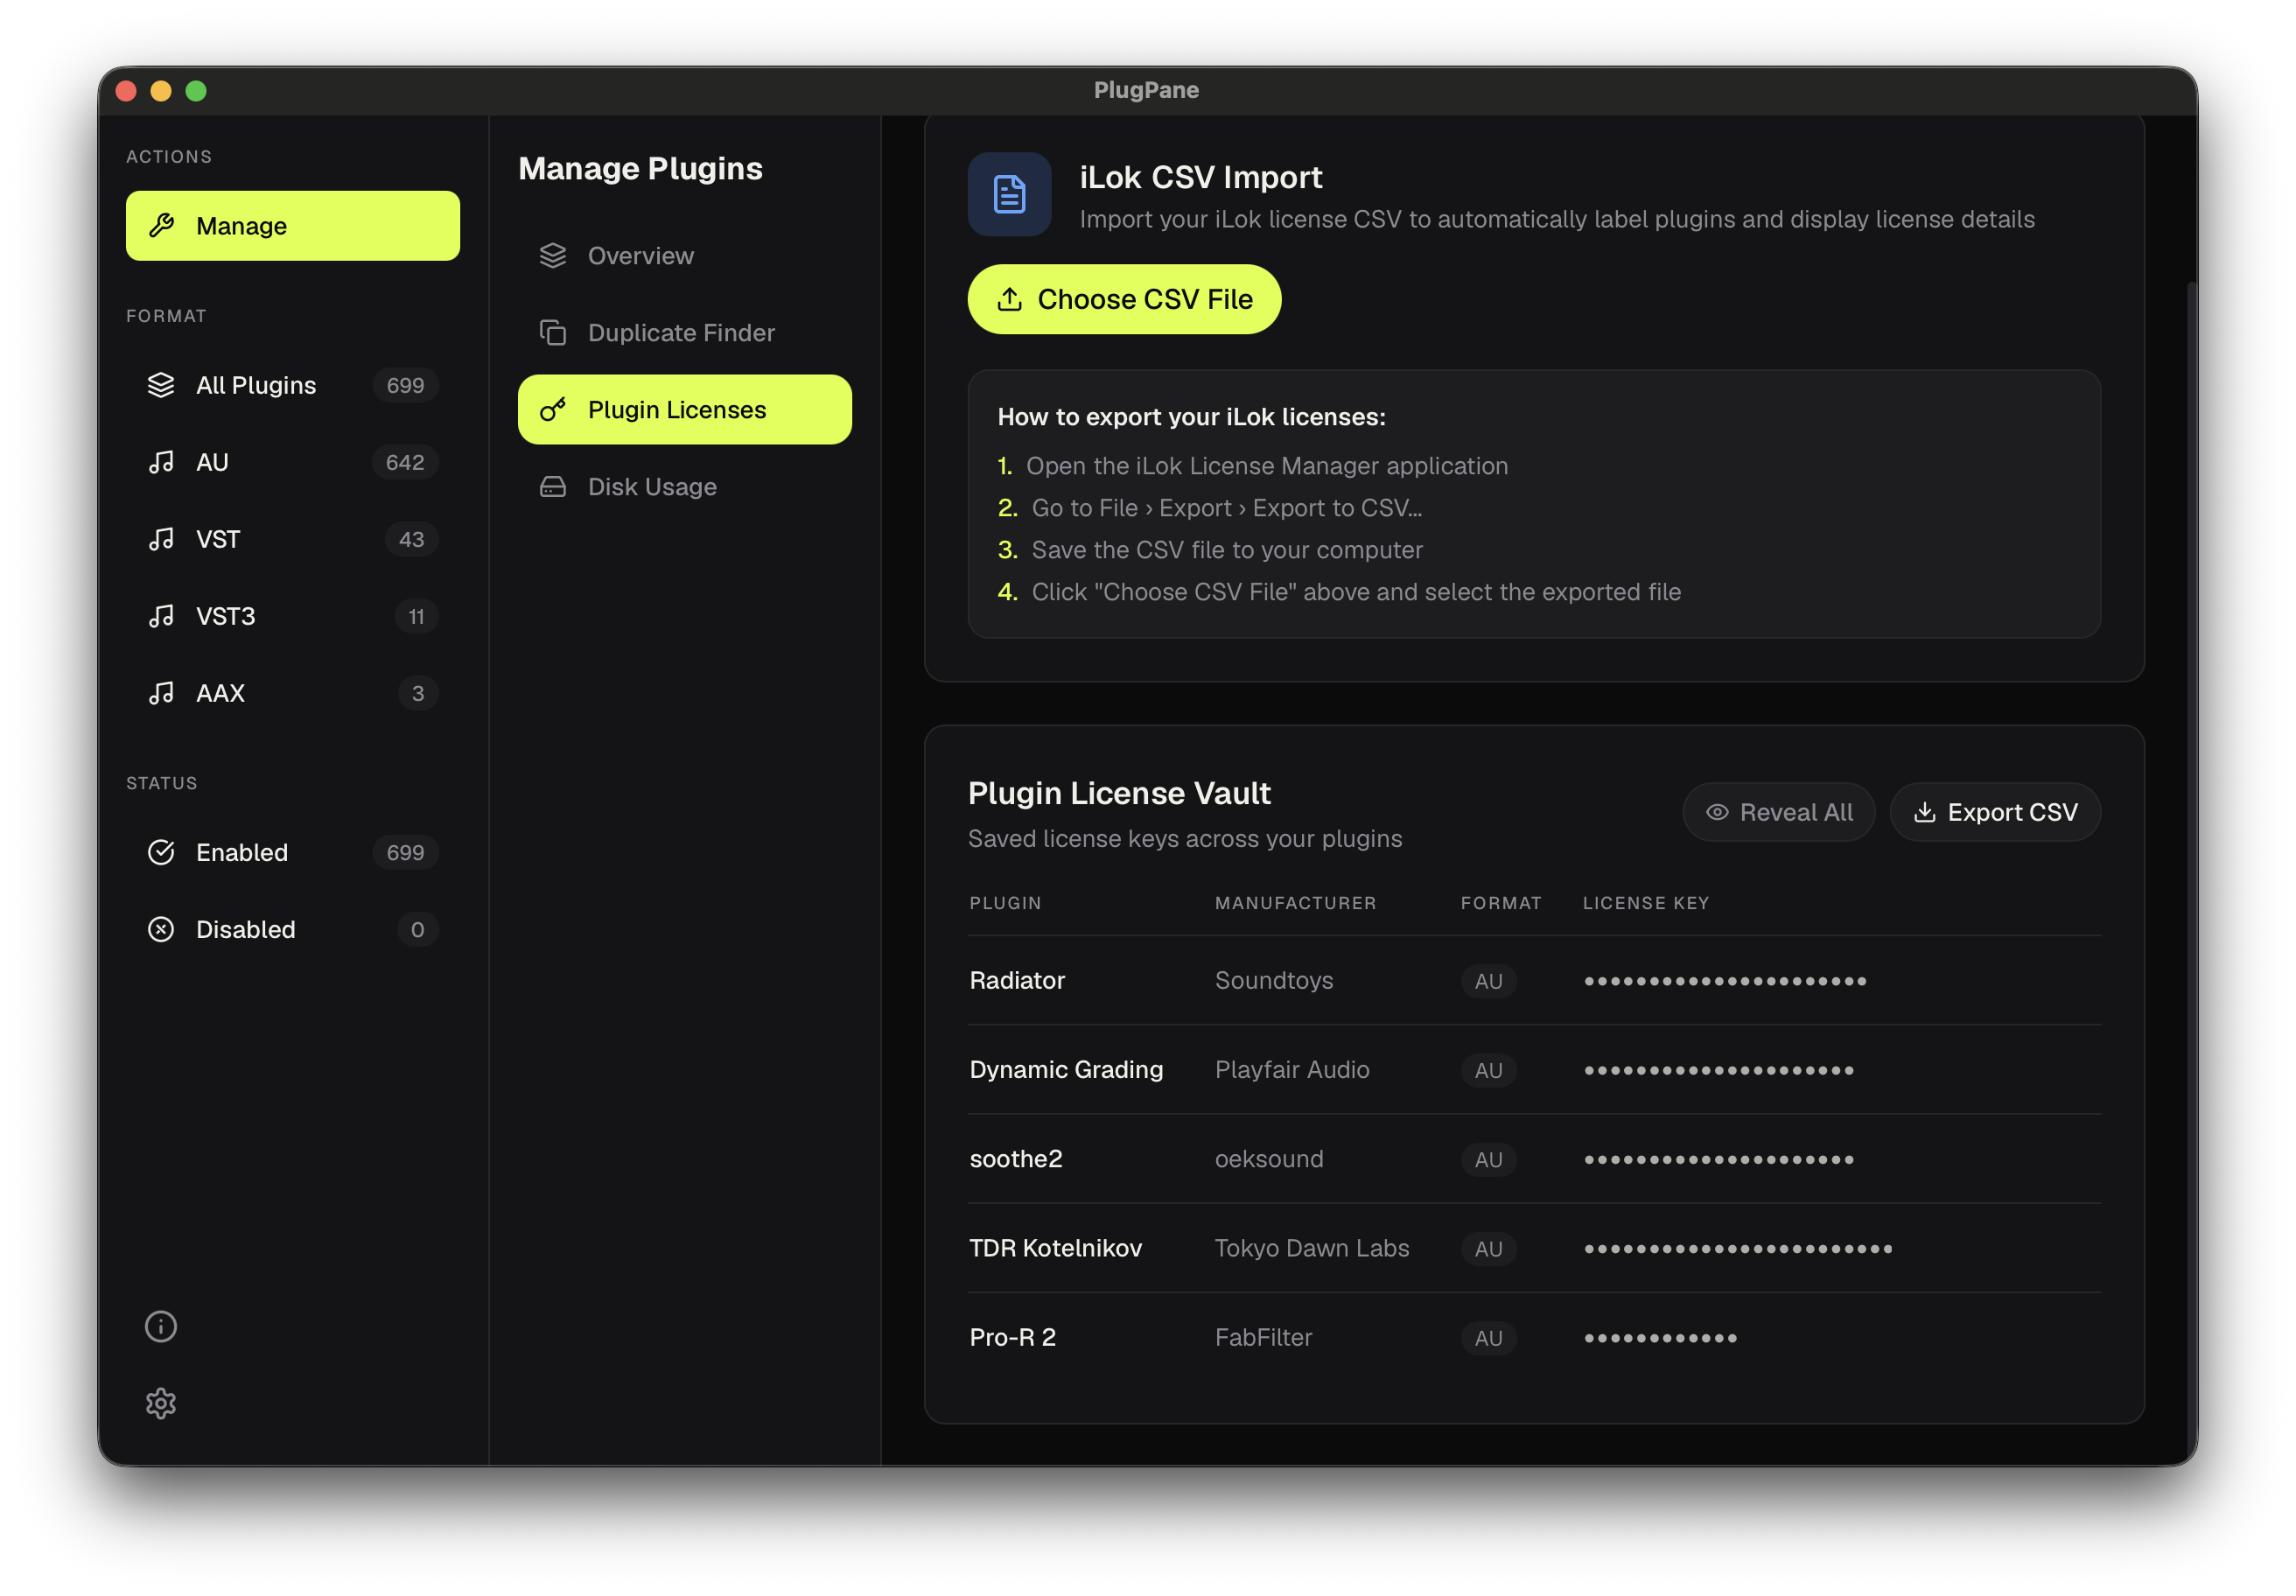
Add a license key: Click any plugin to open the detail panel, scroll to the License section, select "License Key" and paste your serial. Hit Save.
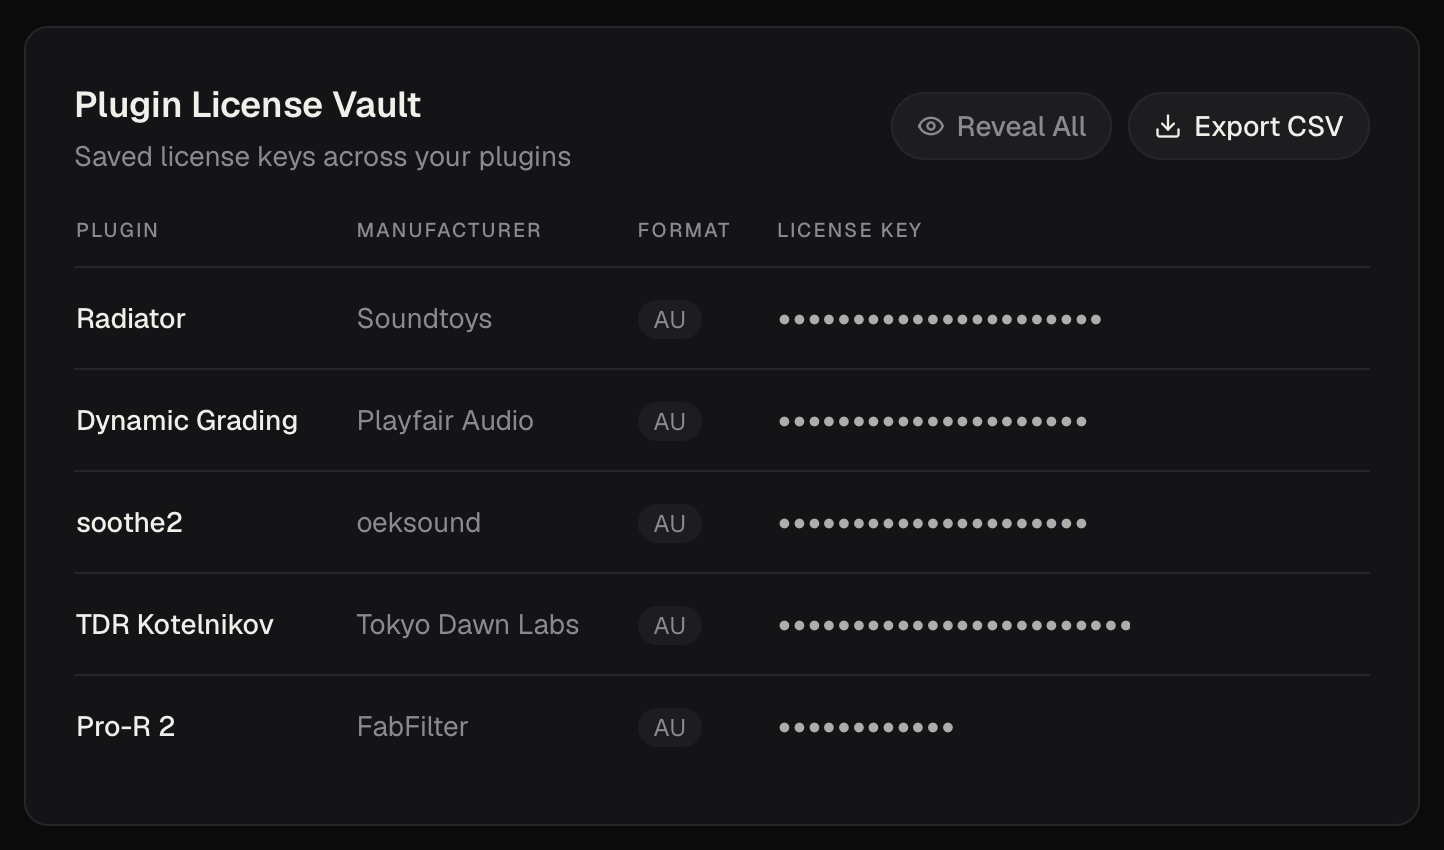
View all keys: Go to Manage → Plugin Licenses. The vault table shows every plugin with a saved serial. Keys are masked (dots) by default.
Reveal a key: Click the eye icon on any row to show that specific serial. Or click Reveal All in the vault header to show everything at once. Click Hide All to re-mask.
Export to CSV: Click the Export CSV button to save your entire vault as a spreadsheet. A confirmation banner shows the exact file path in your Downloads folder.
License types
Paste your serial number directly — stored locally, never uploaded
Import your iLok CSV export to automatically match licenses to plugins in your library
Mark freeware plugins so you know no license is needed
Your license data is stored entirely on your Mac. PlugPane has no account system and never syncs anything to the cloud. Back up the CSV export after adding new keys.
Duplicate Finder
Find redundant plugin installations and reclaim disk space safely.
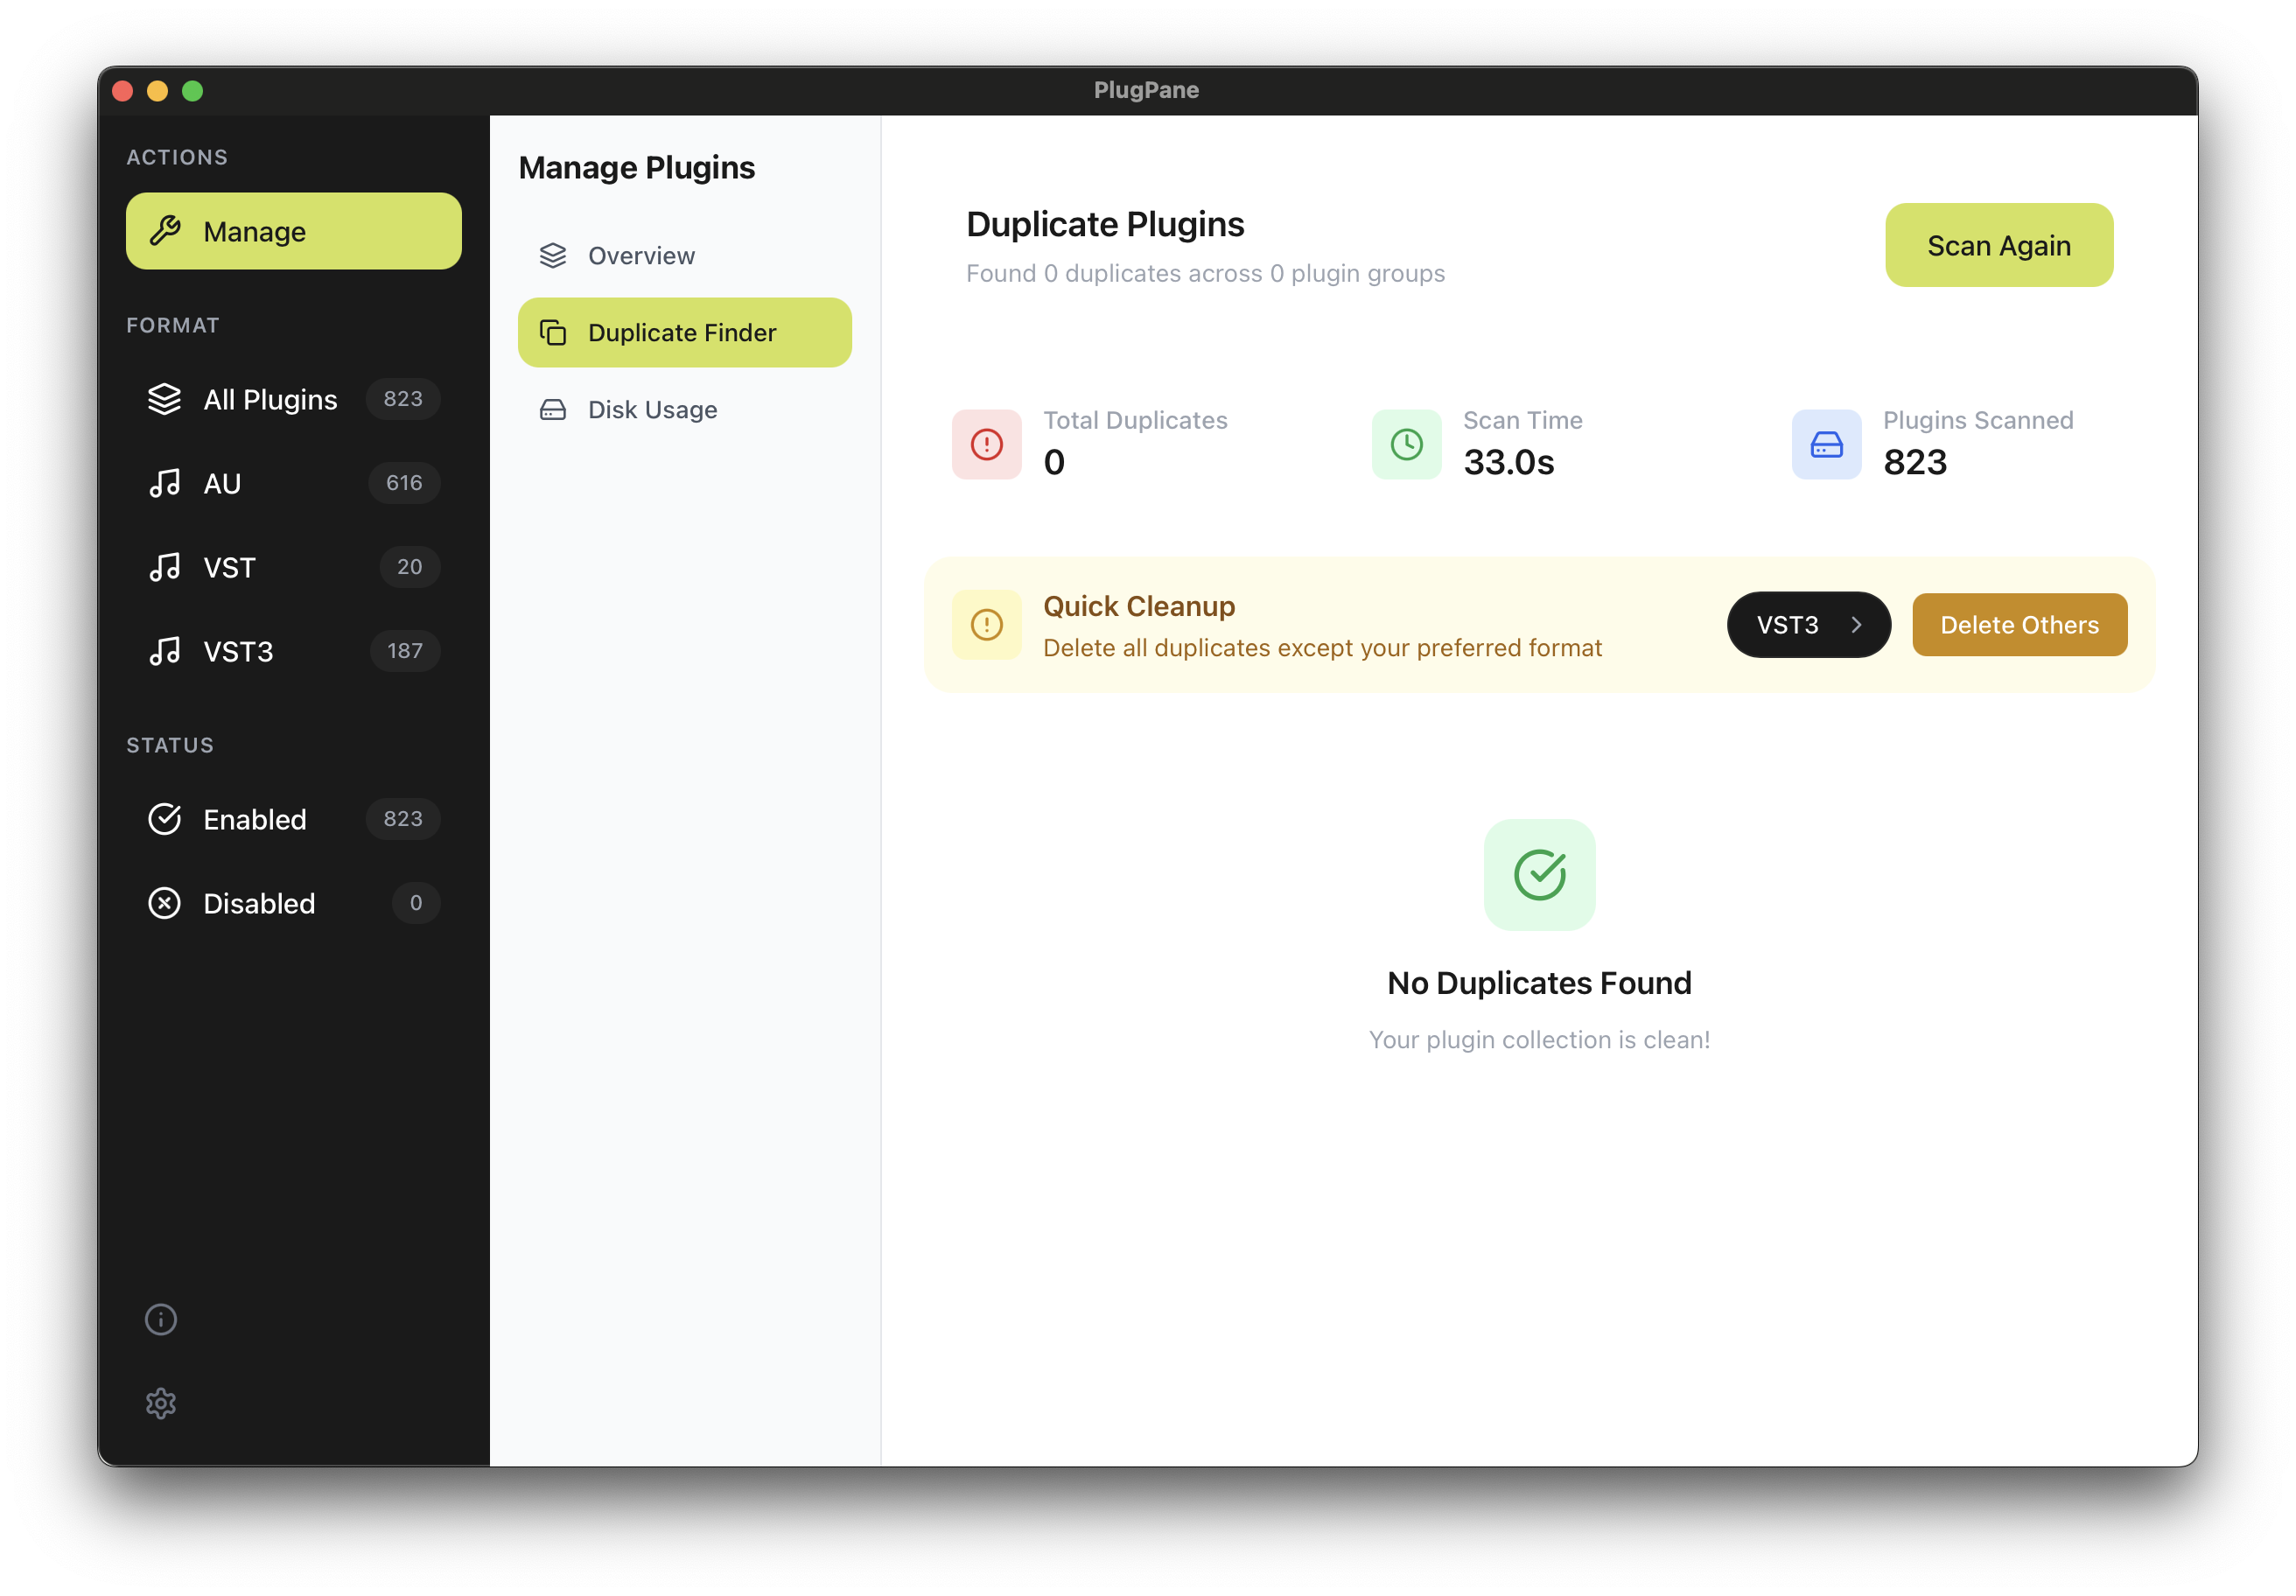
Go to Manage → Duplicate Plugins and click Find Duplicates.
PlugPane matches plugins by name and manufacturer across all formats and locations. Each group shows a confidence score and how much space is recoverable.
Review each group. Select the copy you want to remove — typically the older format (VST2 if you have VST3, for example).
Click Move to Bin. Removed plugins go to the PlugPane Bin rather than being permanently deleted immediately.
When you're ready, empty the bin from the Bin section. If anything was moved by mistake, it's still recoverable until you empty it.
The safest approach: remove one format at a time and open your DAW between each pass to confirm nothing broke before emptying the bin.
Disk Usage
See exactly how much space your plugin collection is consuming, broken down by format and vendor.
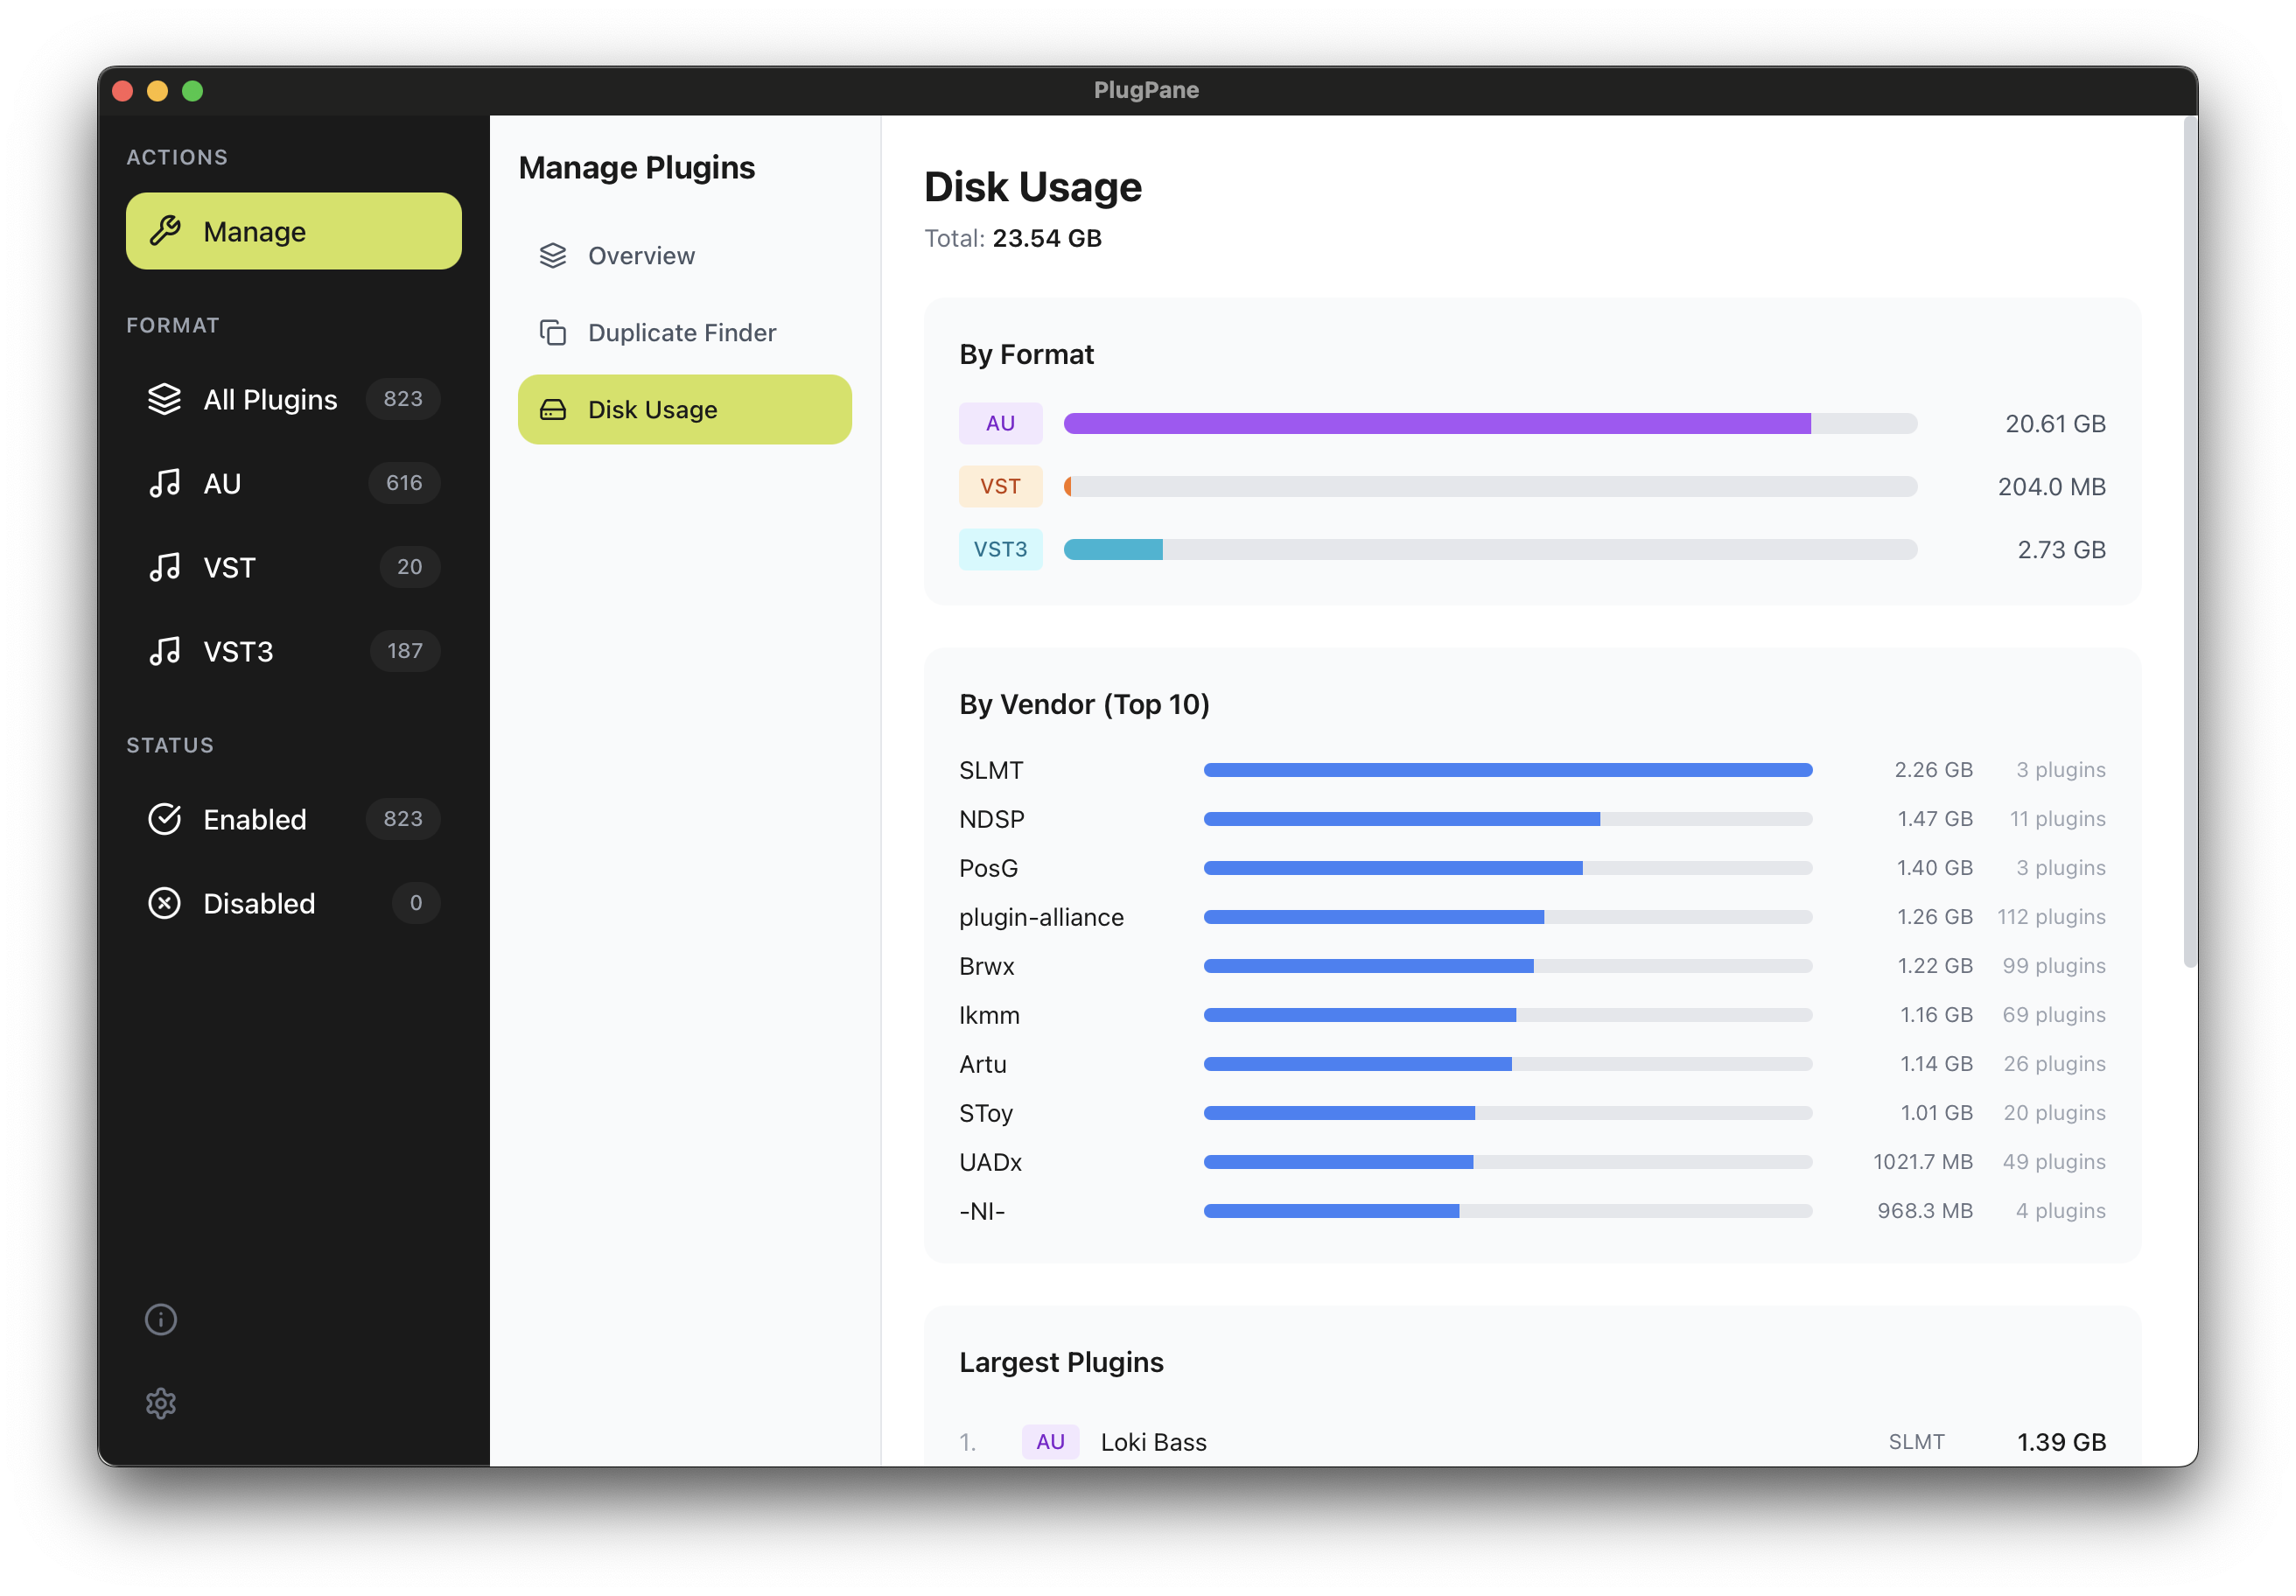
Go to Manage → Disk Usage.
The top section shows total disk usage across your entire library, and a bar breakdown by format (AU, VST, VST3).
The vendor breakdown shows which manufacturers take up the most space — useful for knowing which plugin collections are your heaviest.
The Largest Plugins table lists your biggest individual plugin bundles — good candidates to review if you're trying to free space.
Sampler and sample-library plugins (like Kontakt instruments) can be enormous. If they show up here, the size reflects the plugin bundle only — not the sample content, which lives elsewhere on disk.
Export & Import
Back up your plugin catalogue or move your setup to a new machine.
Export List: Click the Export List button in the toolbar. PlugPane saves a CSV to your Downloads folder containing every plugin: name, manufacturer, format, version, path, tags, license type, and update info.
Import List: Use the Import List button to load a previously exported CSV. This is useful for restoring tags and license assignments after a reinstall or moving to a new Mac.
Export License Vault: In Manage → Plugin Licenses, use the Export CSV button to back up just your serial numbers as a separate file.
What's in the export CSV
Run an export after every major library change — new installs, tag updates, or license additions. It's the fastest way to get back up to speed on a fresh machine.